Essential Tools for Effective Roadside Assistance
- greg beasley
- Sep 16, 2025
- 5 min read

When your car breaks down, you want help fast. Having the right roadside assistance equipment can make all the difference. It saves time, reduces stress, and keeps you safe. I know how important it is to be prepared. That’s why I always keep essential tools in my car. These tools help me handle common problems on the road. Whether it’s a flat tire, dead battery, or overheating engine, the right gear gets me back on track quickly.
Let’s explore the must-have roadside assistance equipment. I’ll share practical tips and examples. You’ll learn what to pack and how to use each item. Being ready means you don’t have to wait long for help. And if you ever need professional help, remember roadside assistance services are just a call away.
Must-Have Roadside Assistance Equipment for Your Car
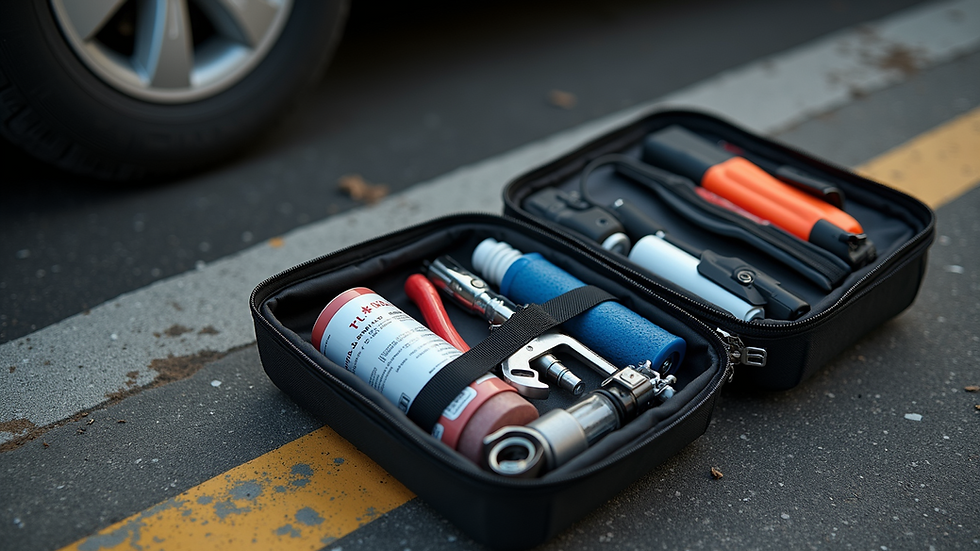
Having the right roadside assistance equipment is key. It helps you fix small issues or stay safe until help arrives. Here are the essentials I never leave home without:
1. Jumper Cables
A dead battery is common. Jumper cables let you jump-start your car using another vehicle. Choose heavy-duty cables with good clamps. Keep them in a waterproof bag. Practice connecting them safely: red to positive, black to negative. This simple tool can save you hours.
2. Tire Repair Kit and Inflator
Flat tires happen anytime. A tire repair kit includes plugs and tools to fix small punctures. A portable air compressor or inflator lets you pump air back into the tire. This combo can get you to the nearest service station without changing the tire on the spot.
3. Spare Tire and Jack
Always check your spare tire’s pressure. A flat spare is no help. The jack and lug wrench let you change a tire safely. Learn how to use them before you need them. Changing a tire is easier with practice.
4. Reflective Warning Triangles and Vest
Safety first. Place reflective triangles behind your car to warn other drivers. Wear a reflective vest if you step outside your vehicle. These items keep you visible, especially at night or on busy roads.
5. Basic Tool Kit
A small tool kit with screwdrivers, pliers, and adjustable wrenches can fix minor issues. Tighten loose bolts or remove debris from your car’s grille. It’s a handy set for quick fixes.
6. Flashlight with Extra Batteries
A bright flashlight is essential for night emergencies. Choose an LED flashlight for long battery life. Keep spare batteries or a rechargeable option. It helps you see clearly and signals for help.
7. Gloves and Rags
Protect your hands with gloves when handling dirty or hot parts. Rags help clean up spills or wipe your hands. These simple items keep you comfortable and clean.

How to Use Roadside Assistance Equipment Effectively
Having equipment is one thing. Knowing how to use it is another. Here are some tips to get the most from your roadside assistance equipment:
Practice at Home: Try changing a tire or jump-starting your car in a safe place. Familiarity reduces panic during real emergencies.
Follow Safety Rules: Always park your car off the road and turn on hazard lights. Use reflective triangles at least 10 feet behind your vehicle.
Read Instructions: Keep manuals for your tools and car handy. Knowing the right steps prevents mistakes.
Stay Calm: Breakdowns are stressful. Take deep breaths and focus on one task at a time.
Call for Help When Needed: If a problem is too big, don’t hesitate to call roadside assistance services. Professionals can get you back on the road safely and quickly.
For example, if your battery dies, use jumper cables to connect to a friend’s car. Make sure the cars are off before connecting cables. Start the working car, then your car. Once your car starts, remove cables in reverse order. This simple process can save you from waiting hours for a tow.

Additional Roadside Assistance Equipment to Consider
Beyond the basics, some extra tools can boost your preparedness. These items are not mandatory but highly recommended:
Portable Battery Charger: A compact charger can jump-start your car without another vehicle. It’s a lifesaver if you’re alone.
Tow Strap or Rope: If your car gets stuck, a tow strap helps another vehicle pull you out. Make sure it’s rated for your car’s weight.
Fire Extinguisher: A small, car-rated fire extinguisher can stop small fires before they spread. Keep it within easy reach.
Multi-tool: A Swiss Army knife or multi-tool offers various functions in one compact device. Useful for unexpected fixes.
Duct Tape: It may sound simple, but duct tape can temporarily fix leaks or hold parts together.
Emergency Blanket: If you get stranded in cold weather, an emergency blanket keeps you warm.
Water and Snacks: Keep bottled water and non-perishable snacks in your car. They help if you wait for help in remote areas.
These extras add peace of mind. They prepare you for less common but possible situations.
Staying Safe While Waiting for Help
Sometimes, you can’t fix the problem yourself. Waiting for professional help is the safest choice. Here’s how to stay safe while you wait:
Move Your Car Off the Road: If possible, pull over to the shoulder or a safe spot. Avoid busy lanes.
Turn on Hazard Lights: This alerts other drivers that your car is stopped.
Use Reflective Gear: Put on your reflective vest and place warning triangles behind your car.
Stay Inside Your Vehicle: If the area is unsafe, stay inside with doors locked.
Call for Help: Contact roadside assistance services for quick, reliable help.
Keep Your Phone Charged: Always have a car charger or power bank to keep your phone ready.
Inform Someone: Let a friend or family member know your location and situation.
Following these steps keeps you visible and protected until help arrives.
Building Your Own Roadside Assistance Kit
Creating your own roadside assistance kit is easy and affordable. Here’s a simple checklist to get started:
Jumper cables
Tire repair kit and inflator
Spare tire, jack, and lug wrench
Reflective warning triangles and vest
Basic tool kit
Flashlight with extra batteries
Gloves and rags
Portable battery charger (optional)
Tow strap or rope (optional)
10. Fire extinguisher (optional)
11. Multi-tool (optional)
12. Duct tape (optional)
13. Emergency blanket (optional)
14. Water and snacks (optional)
Store everything in a sturdy, waterproof bag or box. Keep it in your trunk or under a seat. Check your kit every few months. Replace expired items and test tools regularly.
Being prepared means you can handle most roadside problems yourself. It also means you stay safe and calm. And if you need extra help, professional roadside assistance services are ready to assist.
Having the right roadside assistance equipment is a smart move. It saves time, money, and stress. It keeps you safe and confident on the road. I recommend building your kit today. Practice using your tools. Stay prepared for anything. When you do, you’ll never feel stranded or helpless again.


Comments